


What Size DTF Transfer Should You Order? Complete Guide for Left Chest, Full Front, Sleeve, and Back Prints
Choosing the right DTF transfer size sounds simple until the order is actually in front of you. A logo that looks perfect on screen can print too small on a hoodie, too wide on a youth shirt, or too low on a tote bag. For brands, print shops, schools, contractors, and local businesses ordering custom apparel, sizing mistakes are one of the fastest ways to waste time, film, garments, and customer trust.
That is why transfer size is not just a design detail. It is a production decision. The right size helps the artwork look balanced, readable, and intentional on the finished garment. The wrong size makes even a strong logo look awkward. At Custom Print House, a large part of getting DTF orders right comes down to helping customers match the transfer size to the placement, garment type, audience, and use case before production starts.
This guide explains how to choose the right DTF transfer size for left chest prints, full front designs, full back placements, sleeve graphics, neck labels, and other common applications. It is written for both end customers and professional decorators who want a cleaner way to think about size selection. Whether you are ordering a single sample, a small business uniform run, or repeat wholesale DTF transfers for daily production, this guide will help you choose more confidently.
Why DTF Transfer Size Matters More Than Most Customers Expect
Many buyers focus first on color, turnaround, and price. Those matter, of course, but size has a direct effect on how professional the finished garment looks. A left chest logo that is too large can make a polo or tee look clumsy. A full front graphic that is too narrow can look weak and underpowered, especially on adult large and extra-large garments. A back print that is too tall may crowd the collar and drop too far toward the hem.
Transfer size also affects readability. This is especially important for local business shirts, contractor uniforms, event apparel, team garments, and branded merch. If the logo includes fine text, phone numbers, social handles, or secondary brand elements, choosing the wrong size can make important information harder to read in real use.
From a production perspective, size controls material use, placement accuracy, and consistency across a run. For decorators ordering DTF transfers by size, selecting the right dimension from the beginning usually means fewer revisions, fewer wasted prints, and easier reorders later.
How to Think About DTF Size Before You Place an Order
The best starting point is not asking, “What is the standard size?” The better question is, “What placement am I printing, on what garment, for which audience, and what does the artwork need to do?” That is a much more useful framework because the ideal size changes depending on context.
A chest logo for a plumbing company works differently than a full front band graphic. A youth event shirt needs different proportions than an adult hoodie. A premium fashion brand may want a smaller, cleaner front mark. A fundraiser shirt may need a larger logo because the design must read from a distance. The same artwork file can require a different print size depending on the garment and goal.
As a rule, choose size based on four things:
- the print placement
- the garment type
- the wearer category such as youth or adult
- the visual purpose of the artwork, such as subtle branding, bold promotion, or readable utility information
DTF Transfer Size Chart at a Glance
| Placement | Common Adult Size Range | Common Youth Size Range | Best Use Case |
|---|---|---|---|
| Left chest | 3.5 in to 4.5 in wide | 3 in to 4 in wide | logos, staff branding, uniforms, small brand marks |
| Full front | 9 in to 11.5 in wide | 7.5 in to 9.5 in wide | main graphics, event shirts, merch, promos |
| Full back | 10 in to 12 in wide | 8 in to 10 in wide | large branding, team shirts, contractor info |
| Sleeve | 2.5 in to 3.5 in wide | 2 in to 3 in wide | secondary logos, hashtags, small details |
| Neck label | 2 in to 3 in wide | 1.75 in to 2.5 in wide | inside branding, private label finishing |
| Hat patch style transfer | 2 in to 3.25 in wide | same range | limited cap applications depending on material |
This chart is a starting point, not an unbreakable rulebook. The artwork ratio matters just as much as the width. A square logo behaves differently than a horizontal wordmark. A tall vertical design may need less width and more height to keep its balance.
Left Chest DTF Transfer Size Guide
Left chest is one of the most common placements in custom apparel because it works for uniforms, business shirts, event apparel, school organizations, and brand merch. It is subtle, versatile, and professional when sized correctly.
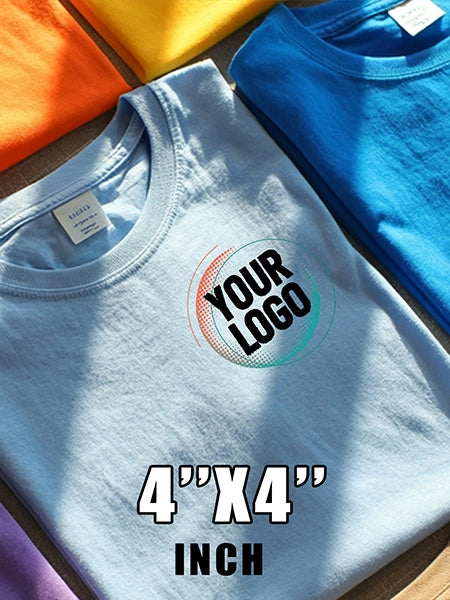
For most adult garments, the safest left chest range is between 3.5 and 4.5 inches wide. Many business logos land very comfortably around 4 inches wide, especially when the artwork is horizontal. For youth sizes, a range closer to 3 to 4 inches wide usually works better.
If the logo includes a lot of fine text, shrinking too far can cause readability issues. In those cases, it may be better to simplify the artwork slightly or move part of the message to a full back print instead of forcing too much detail into a tiny chest placement.
Left chest sizing usually works best for:
- contractor uniforms
- restaurant shirts and aprons
- small business staff apparel
- school club polos and tees
- premium minimalist brand logos
If the order includes sturdier garments, matching the print with related categories like custom workwear or printed workwear often helps keep the final result balanced and practical.
Full Front DTF Transfer Size Guide
Full front is where many customers make their biggest sizing mistake. Some order too small because they worry about overwhelming the shirt. Others go too large and lose balance, especially on smaller adult sizes. The right full front size should feel intentional and centered without crowding the shoulders or hem.
For adult tees and hoodies, a full front design commonly works between 9 and 11.5 inches wide. For youth garments, a typical range is 7.5 to 9.5 inches wide. The exact width depends on whether the graphic is wide, square, or tall.
Use the lower end of the range when:
- the brand wants a cleaner fashion-forward look
- the shirt sizes are mostly small through medium
- the artwork is tall rather than wide
- the design includes negative space as part of the style
Use the higher end of the range when:
- the shirt sizes run larger
- the design is promotional and needs distance visibility
- the artwork is wide and bold
- the garment is a hoodie, heavyweight tee, or event shirt where bigger graphics are expected
Full front placement is especially common for brand merch, school events, company promotions, and campaign apparel. If the design contains multiple pieces, ordering them through an upload DTF gang sheet workflow can make layout and repeat production more efficient.
Full Back DTF Transfer Size Guide
Back prints usually allow for more visual presence than front prints, but that does not mean “as large as possible” is the right answer. Full back graphics need breathing room near the collar and enough clearance above the lower back so the design looks centered on the body instead of stretched over the full length of the shirt.
A practical adult full back range is around 10 to 12 inches wide. For youth, 8 to 10 inches wide is more typical. If the back print includes a horizontal business name, sports identity, event title, or sponsor line, the width may land closer to the upper end of that range. If the design is vertical or stacked, the width may be narrower while the height increases.
Full back is one of the best placements for:
- landscaping, HVAC, plumbing, and contractor contact details
- team shirts and staff identification
- fundraisers and awareness apparel
- event branding and sponsor-backed designs
- streetwear and branded merch drops
When customers want a front-left chest plus full-back combination, sizing should be planned together. The chest print carries the subtle brand presence while the back print carries visibility and impact.
Sleeve Print Size Guide
Sleeve prints can add a lot of value to a garment without dominating it. They work especially well for secondary logos, web addresses, slogans, hashtags, or small design accents. But sleeve graphics need discipline. If they are too large, they wrap awkwardly and lose clarity. If they are too small, they look accidental.
A comfortable adult sleeve print range is usually 2.5 to 3.5 inches wide. Youth sleeve prints often fall between 2 and 3 inches wide. Long sleeves can sometimes support slightly taller or more vertical graphics than short sleeves, but the width still needs control.
Sleeve prints are most useful when:
- you want a second brand hit without adding another major front graphic
- the shirt is part of a premium merch line
- a business wants a simple chest logo and a URL or service tag on the sleeve
- a team or event wants a sponsor or social handle in a clean secondary position
Neck Label and Inner Branding Size Guide
Inside neck prints are often overlooked by first-time buyers, but they make a big difference for private label apparel, startup brand samples, and merch lines that want a more complete retail feel. DTF can work very well for this when the size is controlled and the artwork is simplified for comfort and clarity.
Most inside neck label transfers work best between 2 and 3 inches wide for adults. Youth sizes may need something closer to 1.75 to 2.5 inches wide. Keep text concise and avoid overloading the print with too much information. Brand name, size, and maybe a short tagline are often enough.
This placement is especially useful for clothing brands that want to move beyond blank-garment resale and create a more finished branded product experience.
Youth vs Adult DTF Transfer Sizing
One of the fastest ways to get sizing wrong is applying adult assumptions to youth garments. Youth shirts have narrower chests, shorter torsos, and smaller print-safe areas. A design that looks balanced on an adult medium can easily overwhelm a youth small.
For youth apparel, always scale the artwork down intentionally rather than simply reusing adult dimensions. This matters for school spirit wear, camp shirts, youth sports, family event tees, and nonprofit programs. Even when the artwork is identical, the print size should usually be adjusted.
A good rule is to reduce both width and height while preserving the artwork ratio. If the design includes very fine details, it may be smart to simplify small elements for youth garments rather than shrinking them until they become harder to read.
How Garment Type Changes Ideal DTF Size
Transfer size is not only about the print area. It is also about the garment itself. A lightweight retail-style tee, a heavyweight hoodie, a tote bag, and a work shirt all carry graphics differently. The same 10-inch design can feel large on one product and too small on another.
Here are some quick garment-specific principles:
- T-shirts: the most flexible standard; easy to size for chest, front, and back placements
- Hoodies and sweatshirts: often support slightly larger front and back graphics because the garment body is bulkier
- Polos: left chest usually performs best; full-front placements are less common and can feel off-brand for many business uses
- Tote bags: front graphics often need a different visual center and may be sized based on bag width rather than shirt logic
- Aprons and utility garments: chest and upper-center placements usually need special attention to seams, pockets, or construction details
When customers are ordering mixed products together, choosing sizes individually by product type is much smarter than forcing one universal dimension across everything.
Common DTF Transfer Size Mistakes
Most sizing problems come from a few repeat mistakes. Understanding them in advance saves a lot of trouble.
1. Choosing size only from the screen preview
Artwork can look large on a computer screen and still print too small on a real garment. Physical garment proportions matter more than the screen view.
2. Ignoring the shape of the logo
A wide wordmark and a stacked crest should not be treated the same. Width alone does not tell the whole sizing story.
3. Using one size for adult and youth garments
This is one of the most common ordering errors and often creates awkward results on smaller sizes.
4. Overfilling the back print area
A large back print still needs margin around it. Designs that crowd the collar or hem lose balance.
5. Trying to fit too much text into a small placement
If the artwork includes small supporting text, give it enough size to breathe or move some information to a larger placement.
When to Go Smaller on Purpose
Not every successful print needs maximum coverage. In fact, some of the best-looking garments use restraint. Going smaller can be the right move when the brand wants a premium retail look, when the garment is fashion-focused rather than promotional, or when the graphic is intentionally minimal.
Small front logos, clean left chest marks, and refined sleeve details often work especially well for boutique brands, creator merch, private label apparel, and certain corporate looks. In those cases, the right size is the size that matches the tone of the brand, not the biggest size the garment can physically hold.
When Going Bigger Actually Makes Sense
On the other hand, there are times when larger DTF transfers clearly perform better. Event shirts, fundraiser apparel, branded promo items, sponsor-supported designs, and trade-focused workwear often need stronger visual distance. Larger prints help the design read from farther away and make the message easier to identify quickly.
Bigger also makes sense when the artwork style is bold, graphic, and intentionally high-impact. Streetwear drops, statement back prints, and merch lines built around visual identity often benefit from more print presence than a standard business shirt would.
How Print Shops and Resellers Should Approach Size Standardization
If you are a print shop, apparel brand, or reseller ordering transfers regularly, creating a size standard for repeat placements is one of the smartest workflow improvements you can make. Instead of deciding from scratch on every order, define a working range for your most common jobs.
For example, you might standardize around:
- 4-inch left chest logos for most adult business apparel
- 10.5-inch front graphics for standard adult tees
- 11-inch back prints for contractor and event shirts
- 3-inch sleeve details for secondary branding
This does not replace judgment, but it gives your production process a strong starting point. Shops that order wholesale DTF gang sheets or frequent size-based transfers often save time by keeping a repeat size logic tied to specific client types.
Practical Size Recommendations by Use Case
| Use Case | Suggested Placement | Typical Size Direction |
|---|---|---|
| Small business uniforms | left chest + optional full back | small chest, medium-large back |
| Brand merch drop | full front or full back | medium to large depending on style |
| Contractor work shirts | left chest + full back contact branding | readability first, usually larger back print |
| School event tees | full front | medium to large for visibility |
| Private label sample line | small front mark + neck label | more restrained and clean |
| Restaurant apparel | left chest or apron upper center | moderate, readable, not oversized |
How This Connects to Ordering DTF Transfers by Size
Many customers assume the phrase “DTF transfers by size” is only a pricing category. It is that, but it is also a decision framework. When you order by size intentionally, you are defining how the artwork will behave on the garment before production begins. That means better consistency, fewer assumptions, and a cleaner reorder process later.
If the order is straightforward and the placement is already clear, using the DTF transfers by size product path is often the fastest solution. If the order contains many logos, multiple placements, or repeated small layouts that need efficient batching, a gang sheet workflow can be more practical.
Final Advice Before You Order
If you are still unsure which DTF transfer size to choose, do not default to “average.” Think about where the print will sit, what the garment is supposed to communicate, and how the logo should feel on body. A business uniform should not be sized the same way as a merch hoodie. A youth event tee should not simply inherit adult front dimensions. And a back print that carries key service information should be sized for readability, not just aesthetics.
The best transfer size is the one that matches the garment, the audience, and the job. When those three things line up, the finished piece looks intentional instead of improvised.
FAQ
What is the standard size for a left chest DTF transfer?
For most adult garments, around 3.5 to 4.5 inches wide is the most common working range. Many logos land nicely around 4 inches wide.
What size should a full front DTF transfer be?
Adult full front prints often work between 9 and 11.5 inches wide, depending on the artwork shape and garment size mix.
Should youth shirts use the same transfer size as adult shirts?
No. Youth garments usually need smaller, intentionally scaled versions of the same design to stay balanced and readable.
Is bigger always better for back prints?
No. Back prints need impact, but they also need margin and visual balance. Oversized back designs can feel crowded and unprofessional.
What if my artwork has a lot of tiny text?
Either increase the placement size, simplify the artwork, or move some information to a larger print area. Tiny text in a small logo often loses readability.
Can I use the same artwork on tees, hoodies, and tote bags?
Yes, but the ideal print size may still change by product. Mixed-product orders often look better when each item gets a placement-specific size decision.
Share